
If you’ve ever pulled a pizza out of the oven and thought:
-
“Why did it bake up flat?”
-
“Why didn’t I get oven spring?”
-
“Why is the crust dense instead of light and airy?”
-
“Why did it tear when I stretched it?”
There’s a good chance the problem wasn’t your flour.
It wasn’t your hydration.
It wasn’t your oven.
It was surface tension.
At Virtual Pizza Academy, this is one of the biggest mistakes we see—especially from home bakers learning through edited YouTube videos that skip the most important step: proper dough shaping.
Let’s break down what surface tension actually is, why it matters, and how to fix it immediately.
What Is Surface Tension in Pizza Dough?
Surface tension is the tight outer “skin” you create when shaping a dough ball properly.
Think of it like wrapping the dough in its own gluten jacket.
When shaped correctly:
-
The outside becomes smooth and tight
-
The interior structure stays organized
-
Gas bubbles stay trapped
-
The dough holds its shape
When shaped incorrectly:
-
The surface is loose or wrinkled
-
Gas escapes
-
The dough spreads flat
-
The crust bakes dense and lifeless
Surface tension is what allows your dough to spring in the oven instead of sag.
Why Surface Tension Is So Important
1. It Controls Oven Spring
When dough hits heat, yeast activity spikes and gases expand rapidly.
If your dough ball has proper tension:
-
It expands upward
-
The rim inflates
-
You get an open, airy cornicione
If it doesn’t:
-
Gas escapes sideways
-
The dough spreads
-
You get a flat, tight crust
This matters whether you’re making:
-
New York-style pizza
-
Neapolitan pizza
-
Detroit-style pizza
-
Sicilian pizza
Different styles, same principle.
2. It Creates Structure
Proper tension organizes gluten strands along the exterior. That structure:
-
Helps the dough stretch evenly
-
Prevents tearing
-
Improves crumb openness
-
Builds chew and bite
Without structure, dough becomes slack and fragile.
3. It Improves Fermentation Performance
Surface tension helps trap CO₂ inside the dough ball during cold fermentation.
A tight dough ball:
-
Holds gas
-
Develops better internal alveoli
-
Bakes lighter
A loose dough ball:
-
Degasses too easily
-
Ferments unevenly
-
Bakes dense
The #1 Shaping Mistake
Most people do this:
They cut dough, dust it in flour, loosely round it once… and stop.
That’s not shaping.
That’s just making it round.
True shaping requires:
-
Stretching the outer layer
-
Folding inward
-
Rotating and tightening
-
Creating friction against the work surface
You’re not just rounding dough.
You’re building tension.
What Proper Surface Tension Looks Like

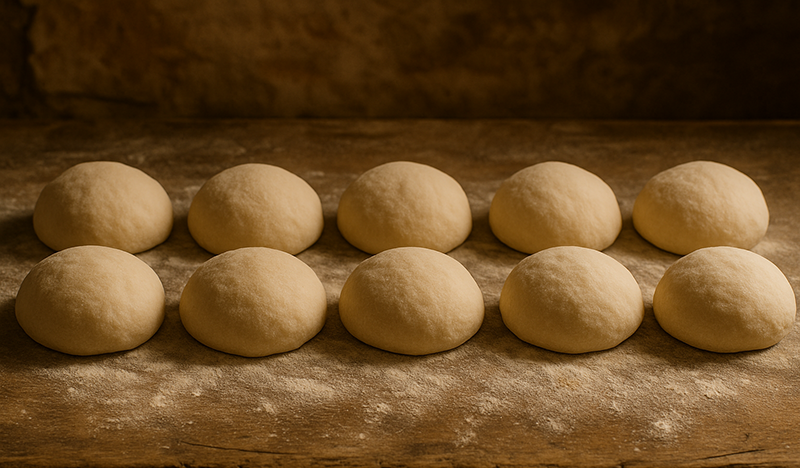
Look for:
-
Smooth exterior
-
Slight resistance when pressed
-
Seam sealed underneath
-
Dough standing tall, not spreading
If it puddles outward immediately, you didn’t build enough tension.
How To Create Proper Surface Tension (Step-By-Step)
Here’s a simple method we teach inside Virtual Pizza Academy:
Step 1: Pre-Shape
Lightly round the dough after dividing. Let it rest 10–15 minutes.
Step 2: Flip Smooth Side Down
Expose the sticky underside.
Step 3: Fold Inward
Pull each edge into the center like closing a pouch.
Step 4: Flip Seam Side Down
Now the smooth side is on top.
Step 5: Drag and Tighten
Cup your hands around the dough ball and drag it gently against the counter to create friction.
This friction stretches the outer gluten layer.
Stop when:
-
The surface is taut
-
The dough resists slightly
-
It feels like a firm water balloon
Don’t over-tighten or you’ll tear the skin.
What Happens If You Skip This Step?
Here’s what we see all the time:
-
Dough sticks to the peel
-
Pizza bakes flat
-
No oven spring
-
Crust lacks structure
-
Bottom browns before rim develops
-
Rim bubbles randomly instead of evenly
People blame flour brands.
They blame hydration.
They blame home ovens.
But 9 times out of 10?
It’s shaping.
Surface Tension and Home Ovens
This is even MORE important in home ovens.
Unlike a 900°F wood oven, most home ovens operate between 500–550°F.
Lower heat means:
-
Slower expansion
-
Less explosive spring
-
More need for structural support
If you’re baking at home, surface tension is not optional.
It’s critical.
This is something we go deep into in our Home Oven NY Style Pizza Class at Virtual Pizza Academy—because you don’t need a deck oven to make professional-level pizza.
You need technique.
The Edited-Video Problem
Most free videos online:
-
Show mixing
-
Show stretching
-
Show the final bake
What they skip:
-
The pressure
-
The friction
-
The hand positioning
-
The tightening process
-
The “feel” of proper tension
That’s why cooking live matters.
At Virtual Pizza Academy, we shape dough in real time, answer questions live, and fix mistakes as they happen.
Because shaping is tactile.
It’s visual.
It’s nuanced.
And it’s the difference between average and elite pizza.
Pro Tip: The Finger Test
After shaping, press your finger lightly into the dough.
If:
-
It slowly springs back and holds shape → Good tension
-
It collapses flat → Too loose
-
It snaps back aggressively → Too tight
You want controlled elasticity.
Final Takeaway
If your pizza is coming out flat, dense, or lacking oven spring…
Before adjusting:
-
Hydration
-
Flour
-
Fermentation time
-
Yeast percentage
Fix your shaping.
Surface tension is the invisible structure that makes everything else work.
Master this one skill and your pizza improves instantly.
Want To See It Done Live?
Inside Virtual Pizza Academy, we break down:
-
Proper dough division
-
Surface tension building
-
Fermentation control
-
Stretching without degassing
-
Home oven optimization
No edits.
No skipped steps.
No missing details.
Just real instruction, in real time.
Because great pizza isn’t luck.
It’s technique.
0 comments